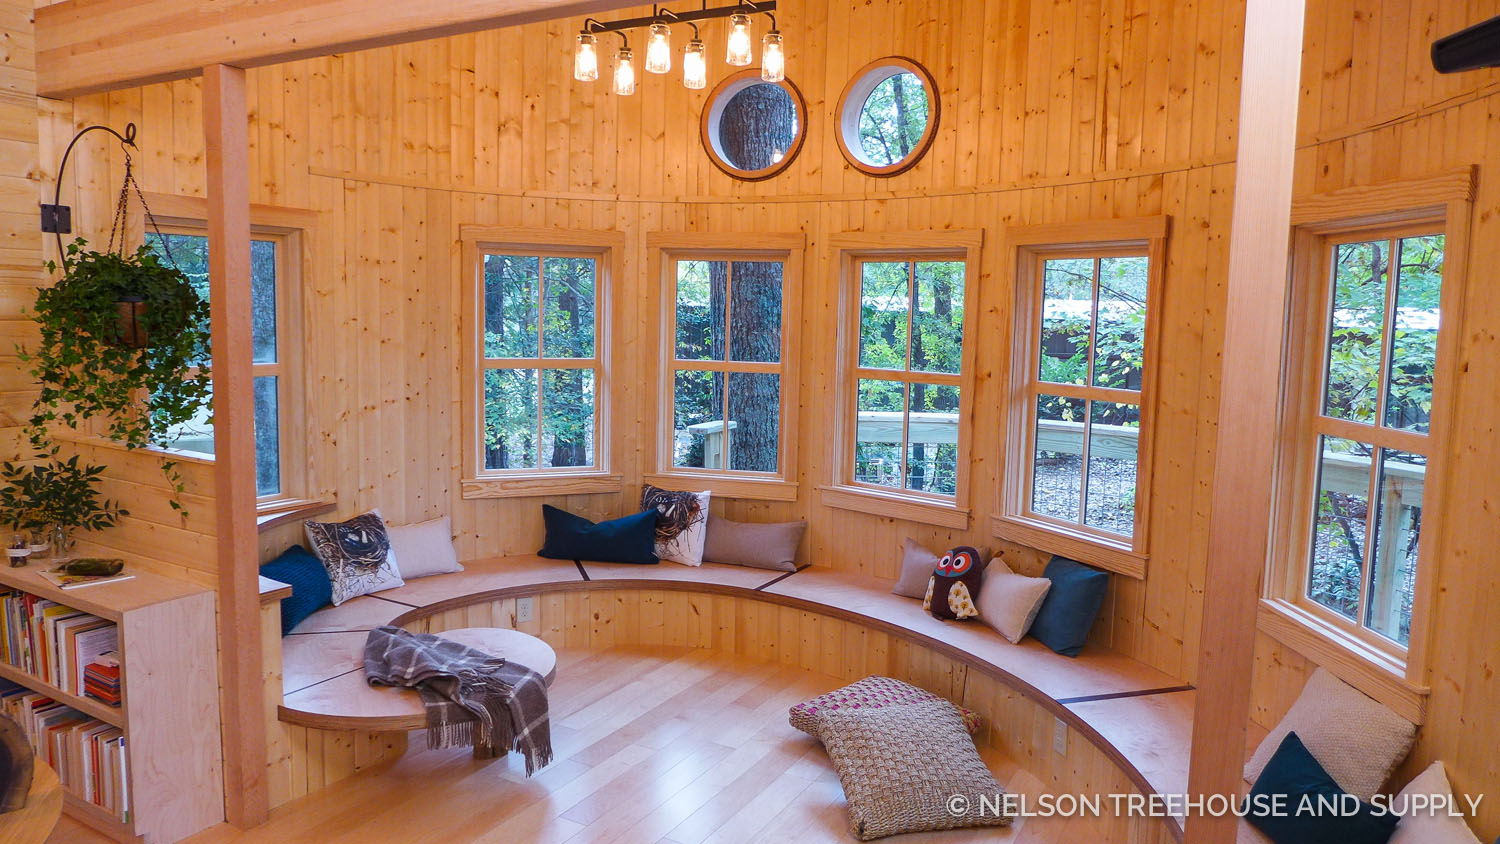
Did you fall in love with the elegantly curved bench inside the Owl’s Nest Library Treehouse? Pete based its design on the Fibonacci Spiral. This sequence of numbers, wherein each number after the first two in the sequence is equal to the sum of the two preceding numbers (e.g., 1, 1, 2, 3, 5, 8, 13, etc.), approaches the golden spiral, which is often found in nature. Leaves, flowers, pinecones, seeds, and shells are just a few of the natural objects that embody the golden spiral. The spiral also has appeared in art and architecture throughout history, as its proportions are known to produce aesthetic appeal.
So how did Pete take the Fibonacci Spiral from a number sequence to a buildable design? And how did our carpenters transform it into wood? Read on to find out!
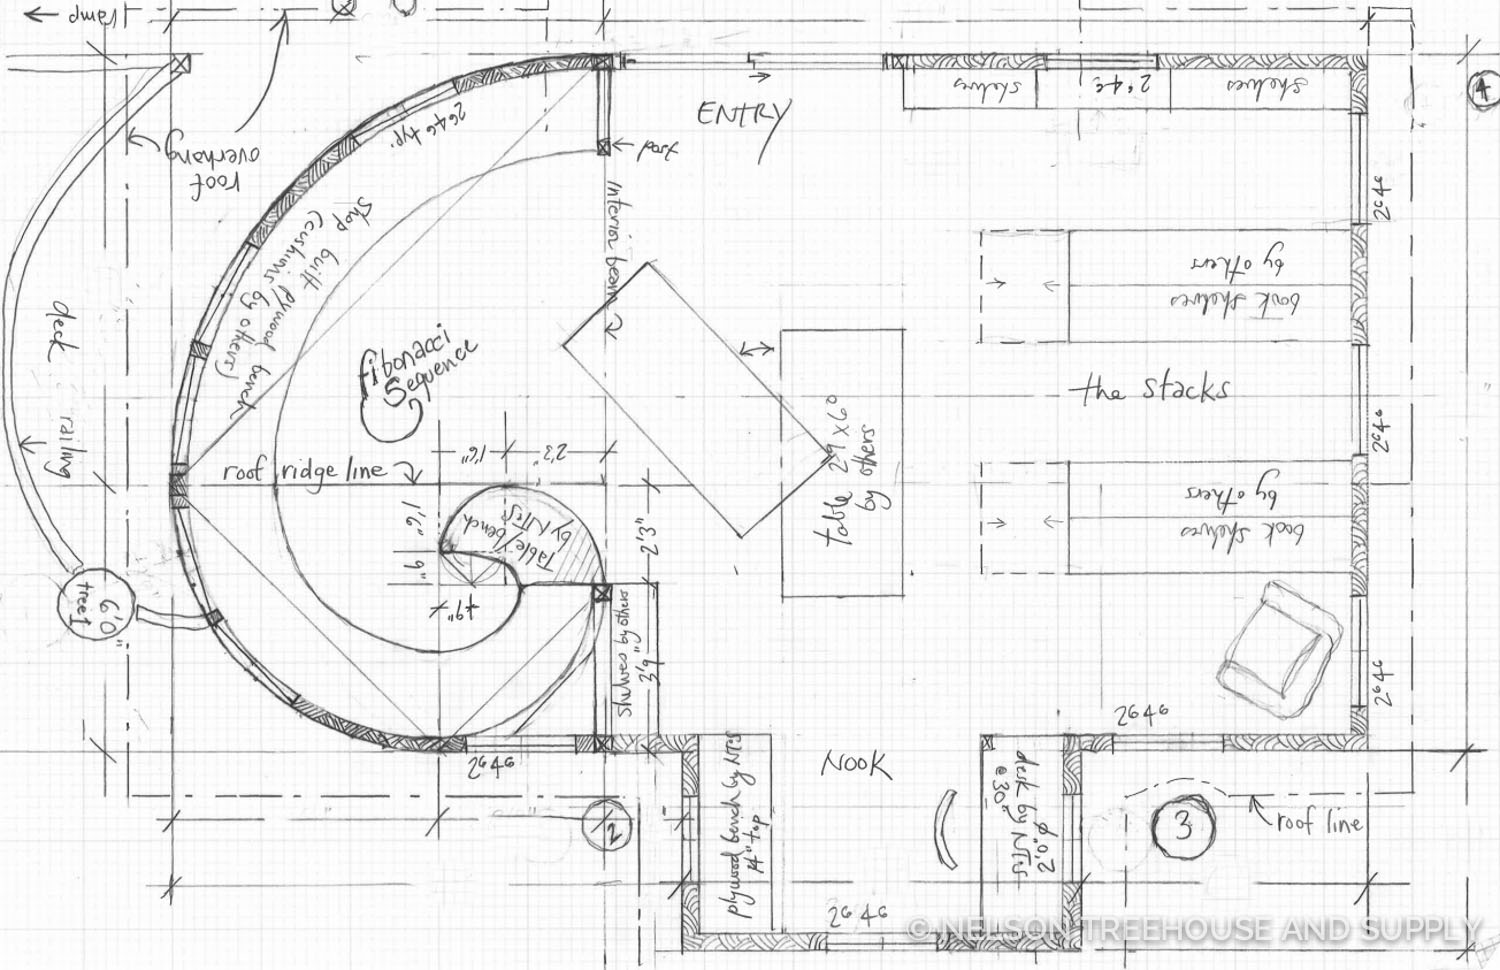 Pete’s Drawing for the interior of the Owl’s nest Treehouse. You can see that the inner-most square of the fibonacci Spiral is 9″ x 9″.
To design the bench in accordance with the Fibonacci Spiral, Pete first measured the dimensions of the space in which it was to fit. These dimensions gave Pete the lengths of the rectangle that would contain the spiral. The Fibonacci Spiral consists of squares that correspond to the Fibonacci sequence of numbers, such that the two innermost squares each measure 1 unit x 1 unit, the third square measures 2 units x 2 units, the fourth square 3 x 3, the fifth 5 x 5 , the sixth 8 x 8, and so forth in accordance to the number sequence. Set side by side, these squares form increasingly larger rectangles. By drawing arcs inside each square that are equal to each square’s length (known as the radius), one can trace a spiral through the largest rectangle.
Pete knew that the length of this large rectangle had to be 15′ 9 ” with a width of 9′ 9″. Pete then used this width to trace the outermost square of the spiral, measuring 9′ 9″ x 9′ 9″. With the remaining length, Pete traced the second square, measuring 6′ x 6′. Pete continued tracing squares until he reached the innermost section, which contained two squares each measuring 9″ x 9″. These two squares represent the beginning of the Fibonacci sequence. In total, Pete’s spiral bench consisted of seven squares (including the two initial 9″ x 9″ squares).
Pete then used “control points” (as indicated in the construction drawing, below) to center his compass before drawing arcs inside each square, using each square’s radius (which is equal to the length of each square). Five arcs in total create the outer curve of the spiral.
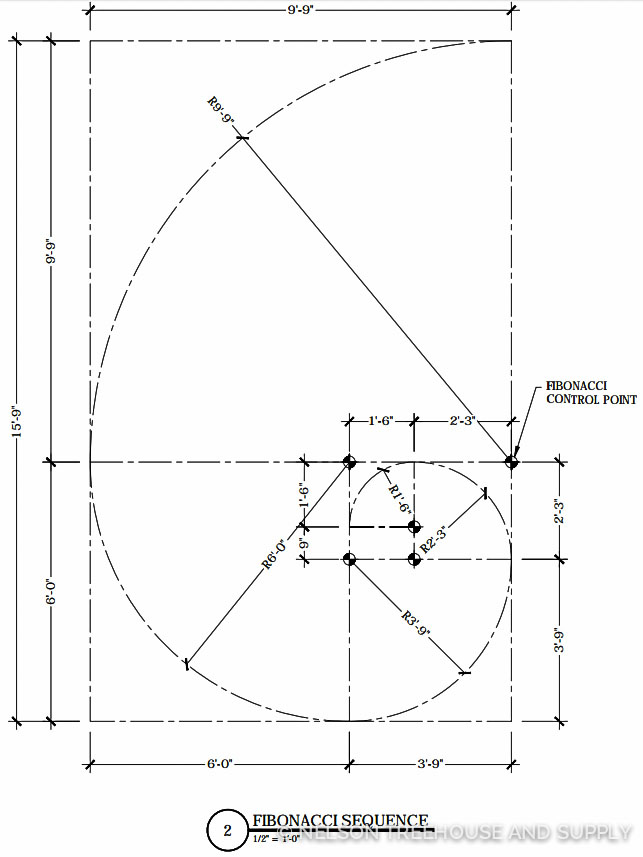 Construction drawing for the fibonacci bench
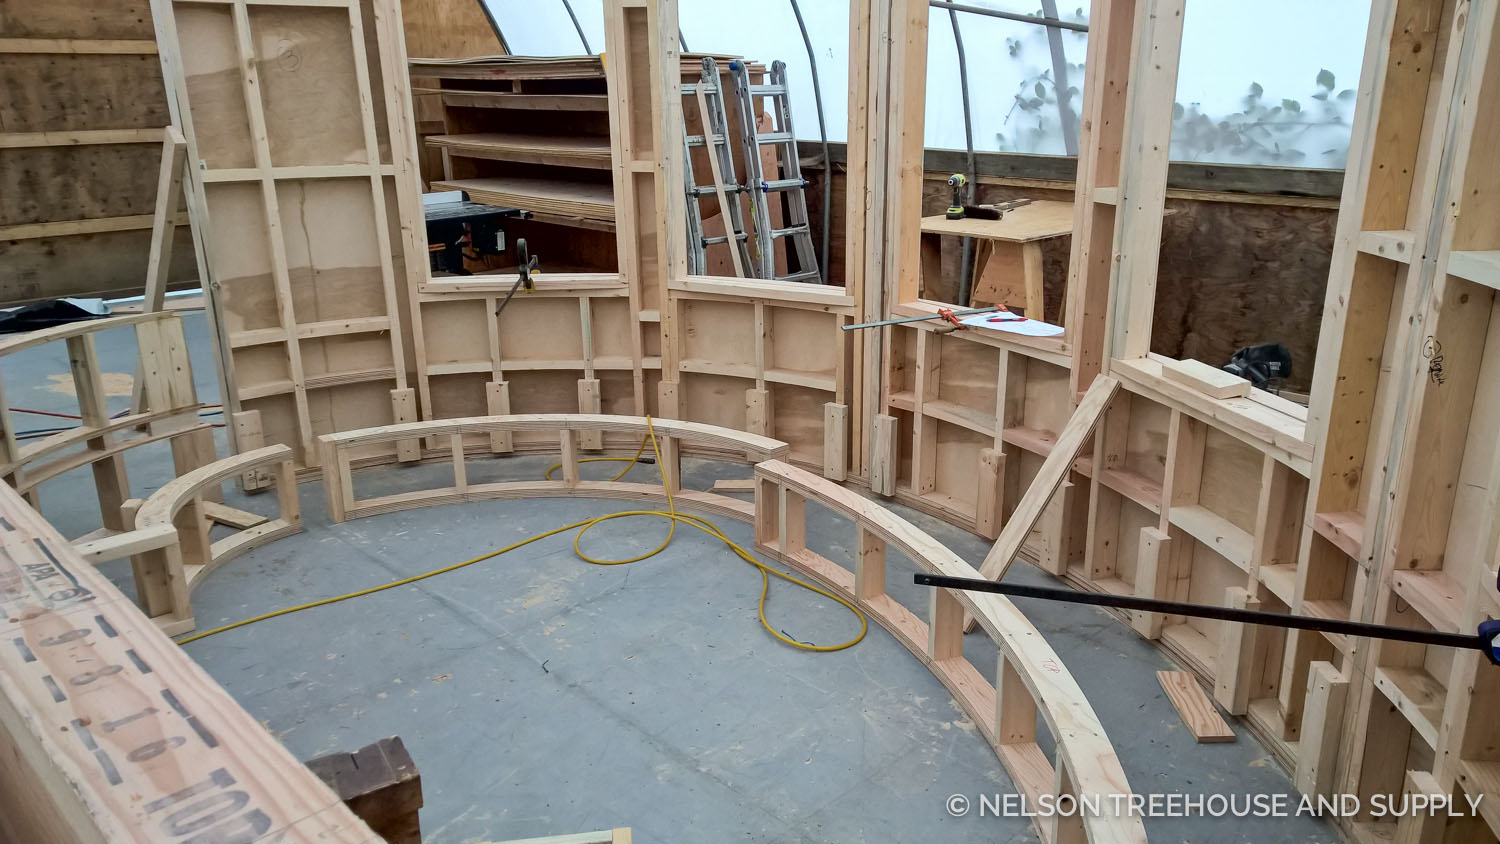
Now for the fun part- transforming Pete’s mathematically sound drawings into tangible products! The carpenters in the NT&S prefabrication shop began by building the curved walls that lie behind the bench. The crew used large compasses (comprised of a bolt as a pivot point, metal bar or long piece of wood, and a writing utensil) to trace the squares and arcs from the drawings onto giant sheets of paper on the shop floor. They then placed plywood sheets on top of the traced figures on the paper and traced each cut onto the wood. It’s important to use plywood for curved shapes, since it will not snap or break along any one grain direction. Next, the crew used a bandsaw and another large compass system to cut the curved plates from the plywood for the base of the walls. To smoothly run the plywood through the bandsaw, the crew built a supporting “sled” that held the wood in place. You can see this process in the video below.
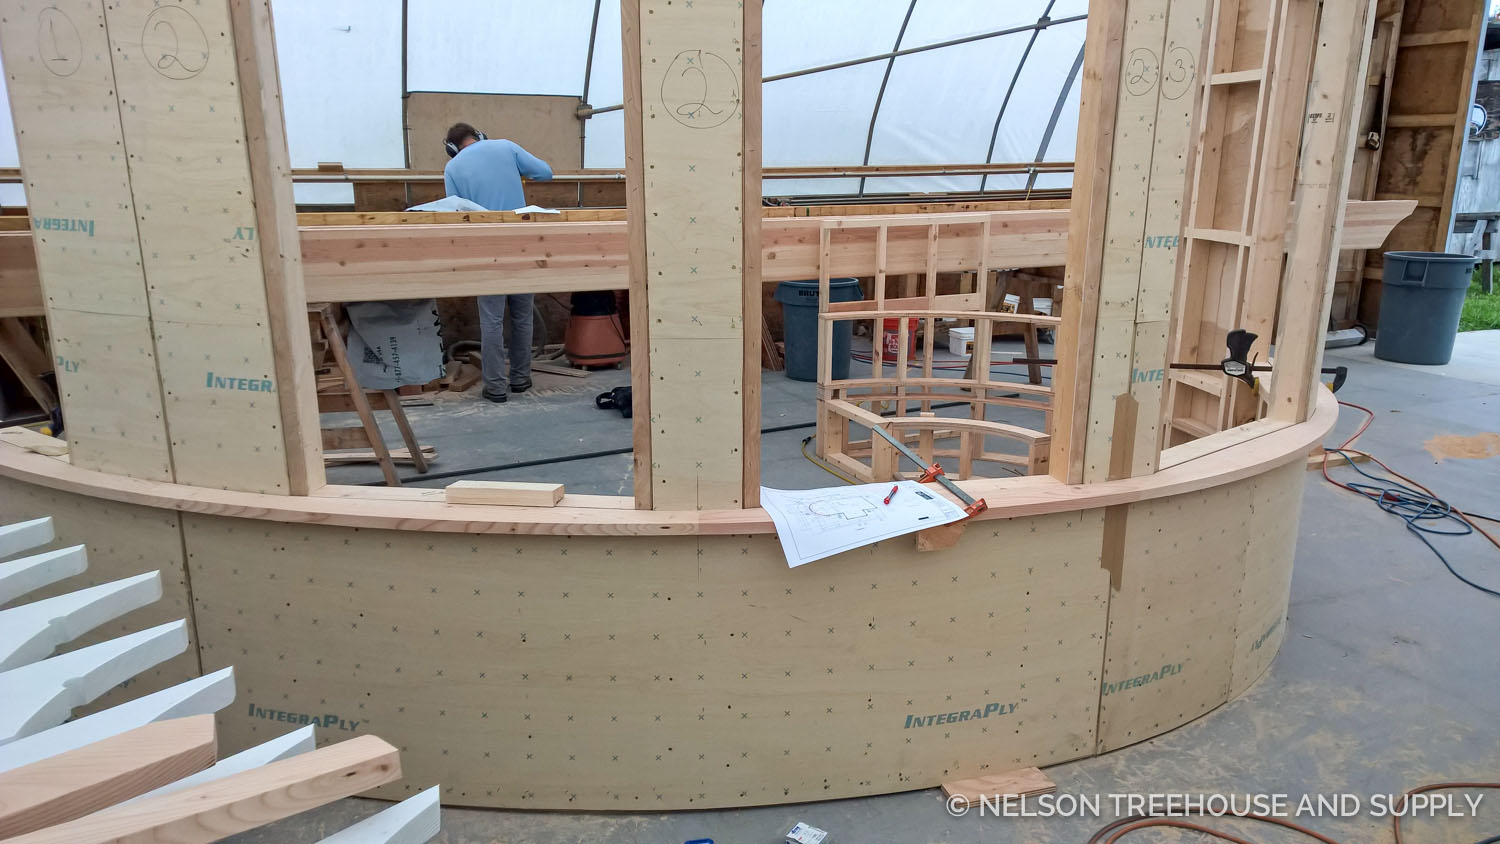 Building The Walls
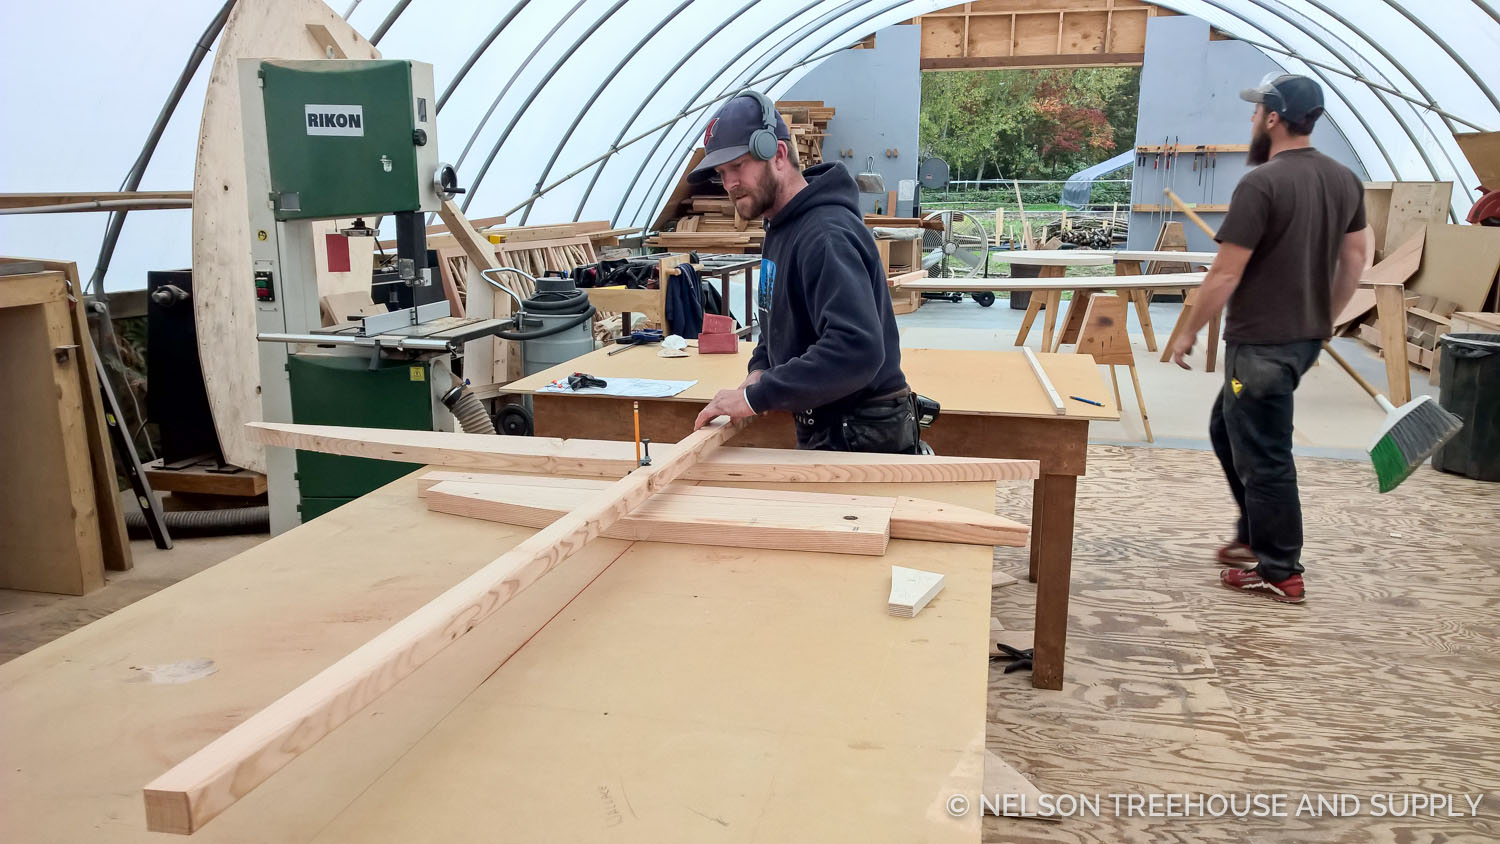 Patrick creating curved trim for the outside of the walls
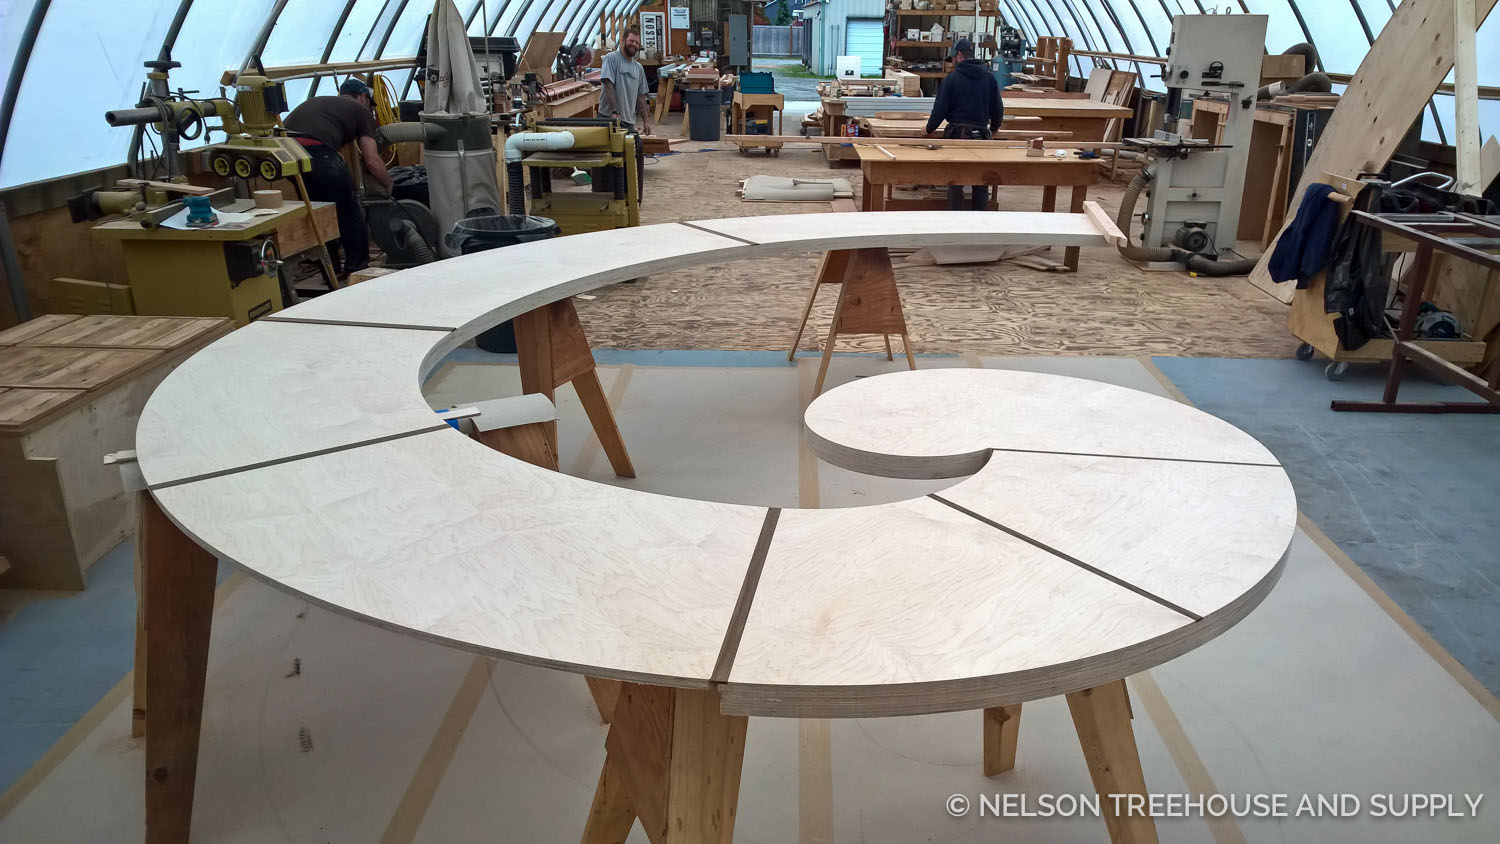
The crew built the walls on these curved plates before starting in on the Fibonacci bench. Again, the crew traced the arcs onto sheets of plywood that were set on the spiral traced onto paper. They then attached a router to the end of their large compass to cut along the spiral shape. Once the segments of the spiral were cut out, the crew joined the edges with dominos. Carpenter Rolf added the dark IPE inlays to cover the seems between plywood sheets. Each inlay is slighter wider than the last, mirroring the growth of the spiral. Rolf also intended some of these inlays to fall approximately on the lines of the Fibonacci squares.
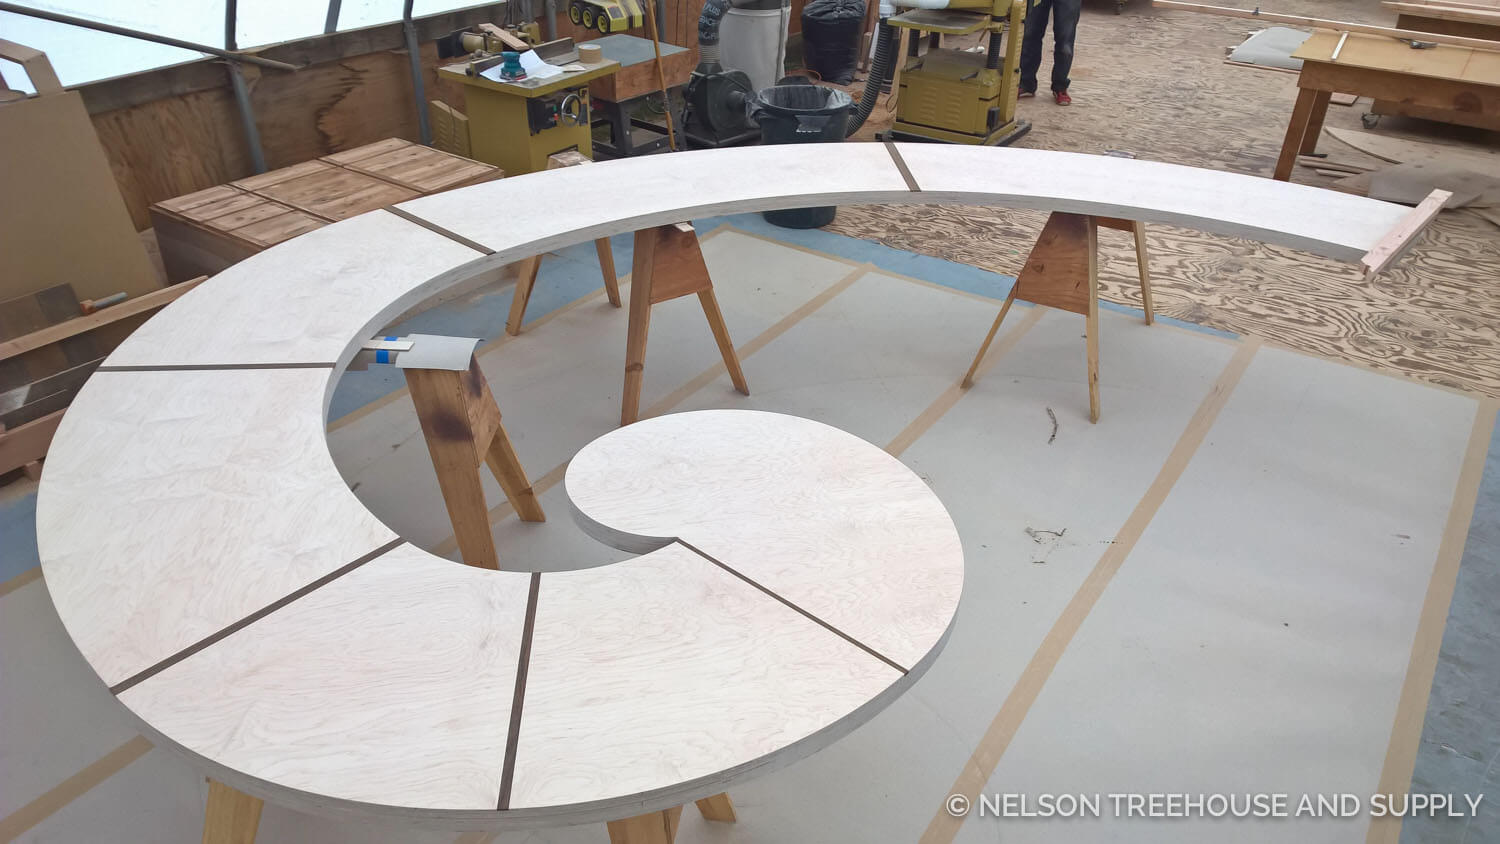
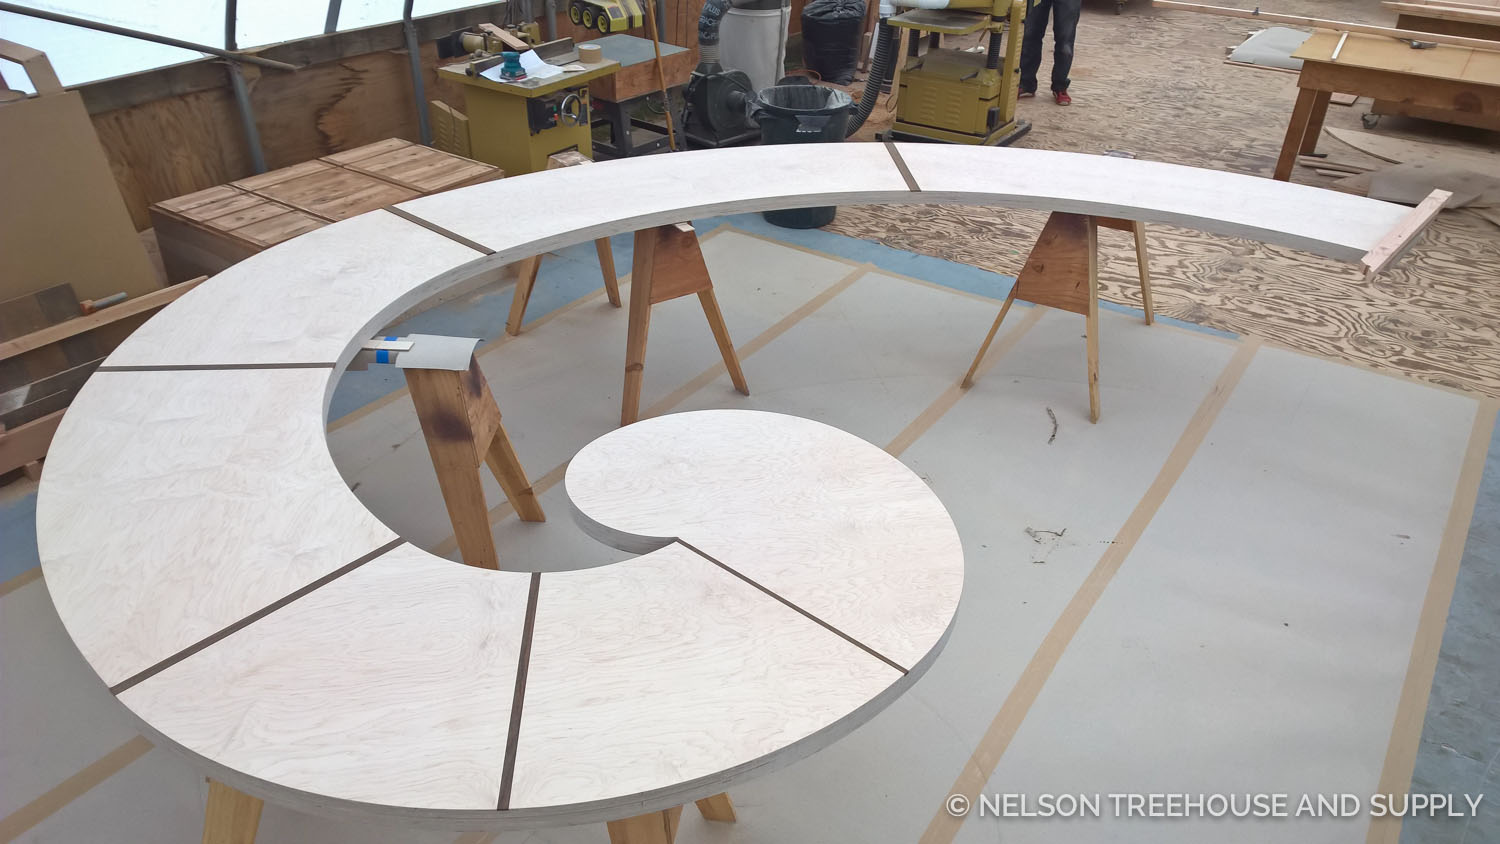 Completed surface of the Fibonacci Spiral Bench
The prefabrication crew also built internal plywood supports beneath the surface of the bench. To finish the bench onsite, the crew attached it to the wall using wall cleats. They used the same pine tongue and groove as the walls to create the front of the bench.
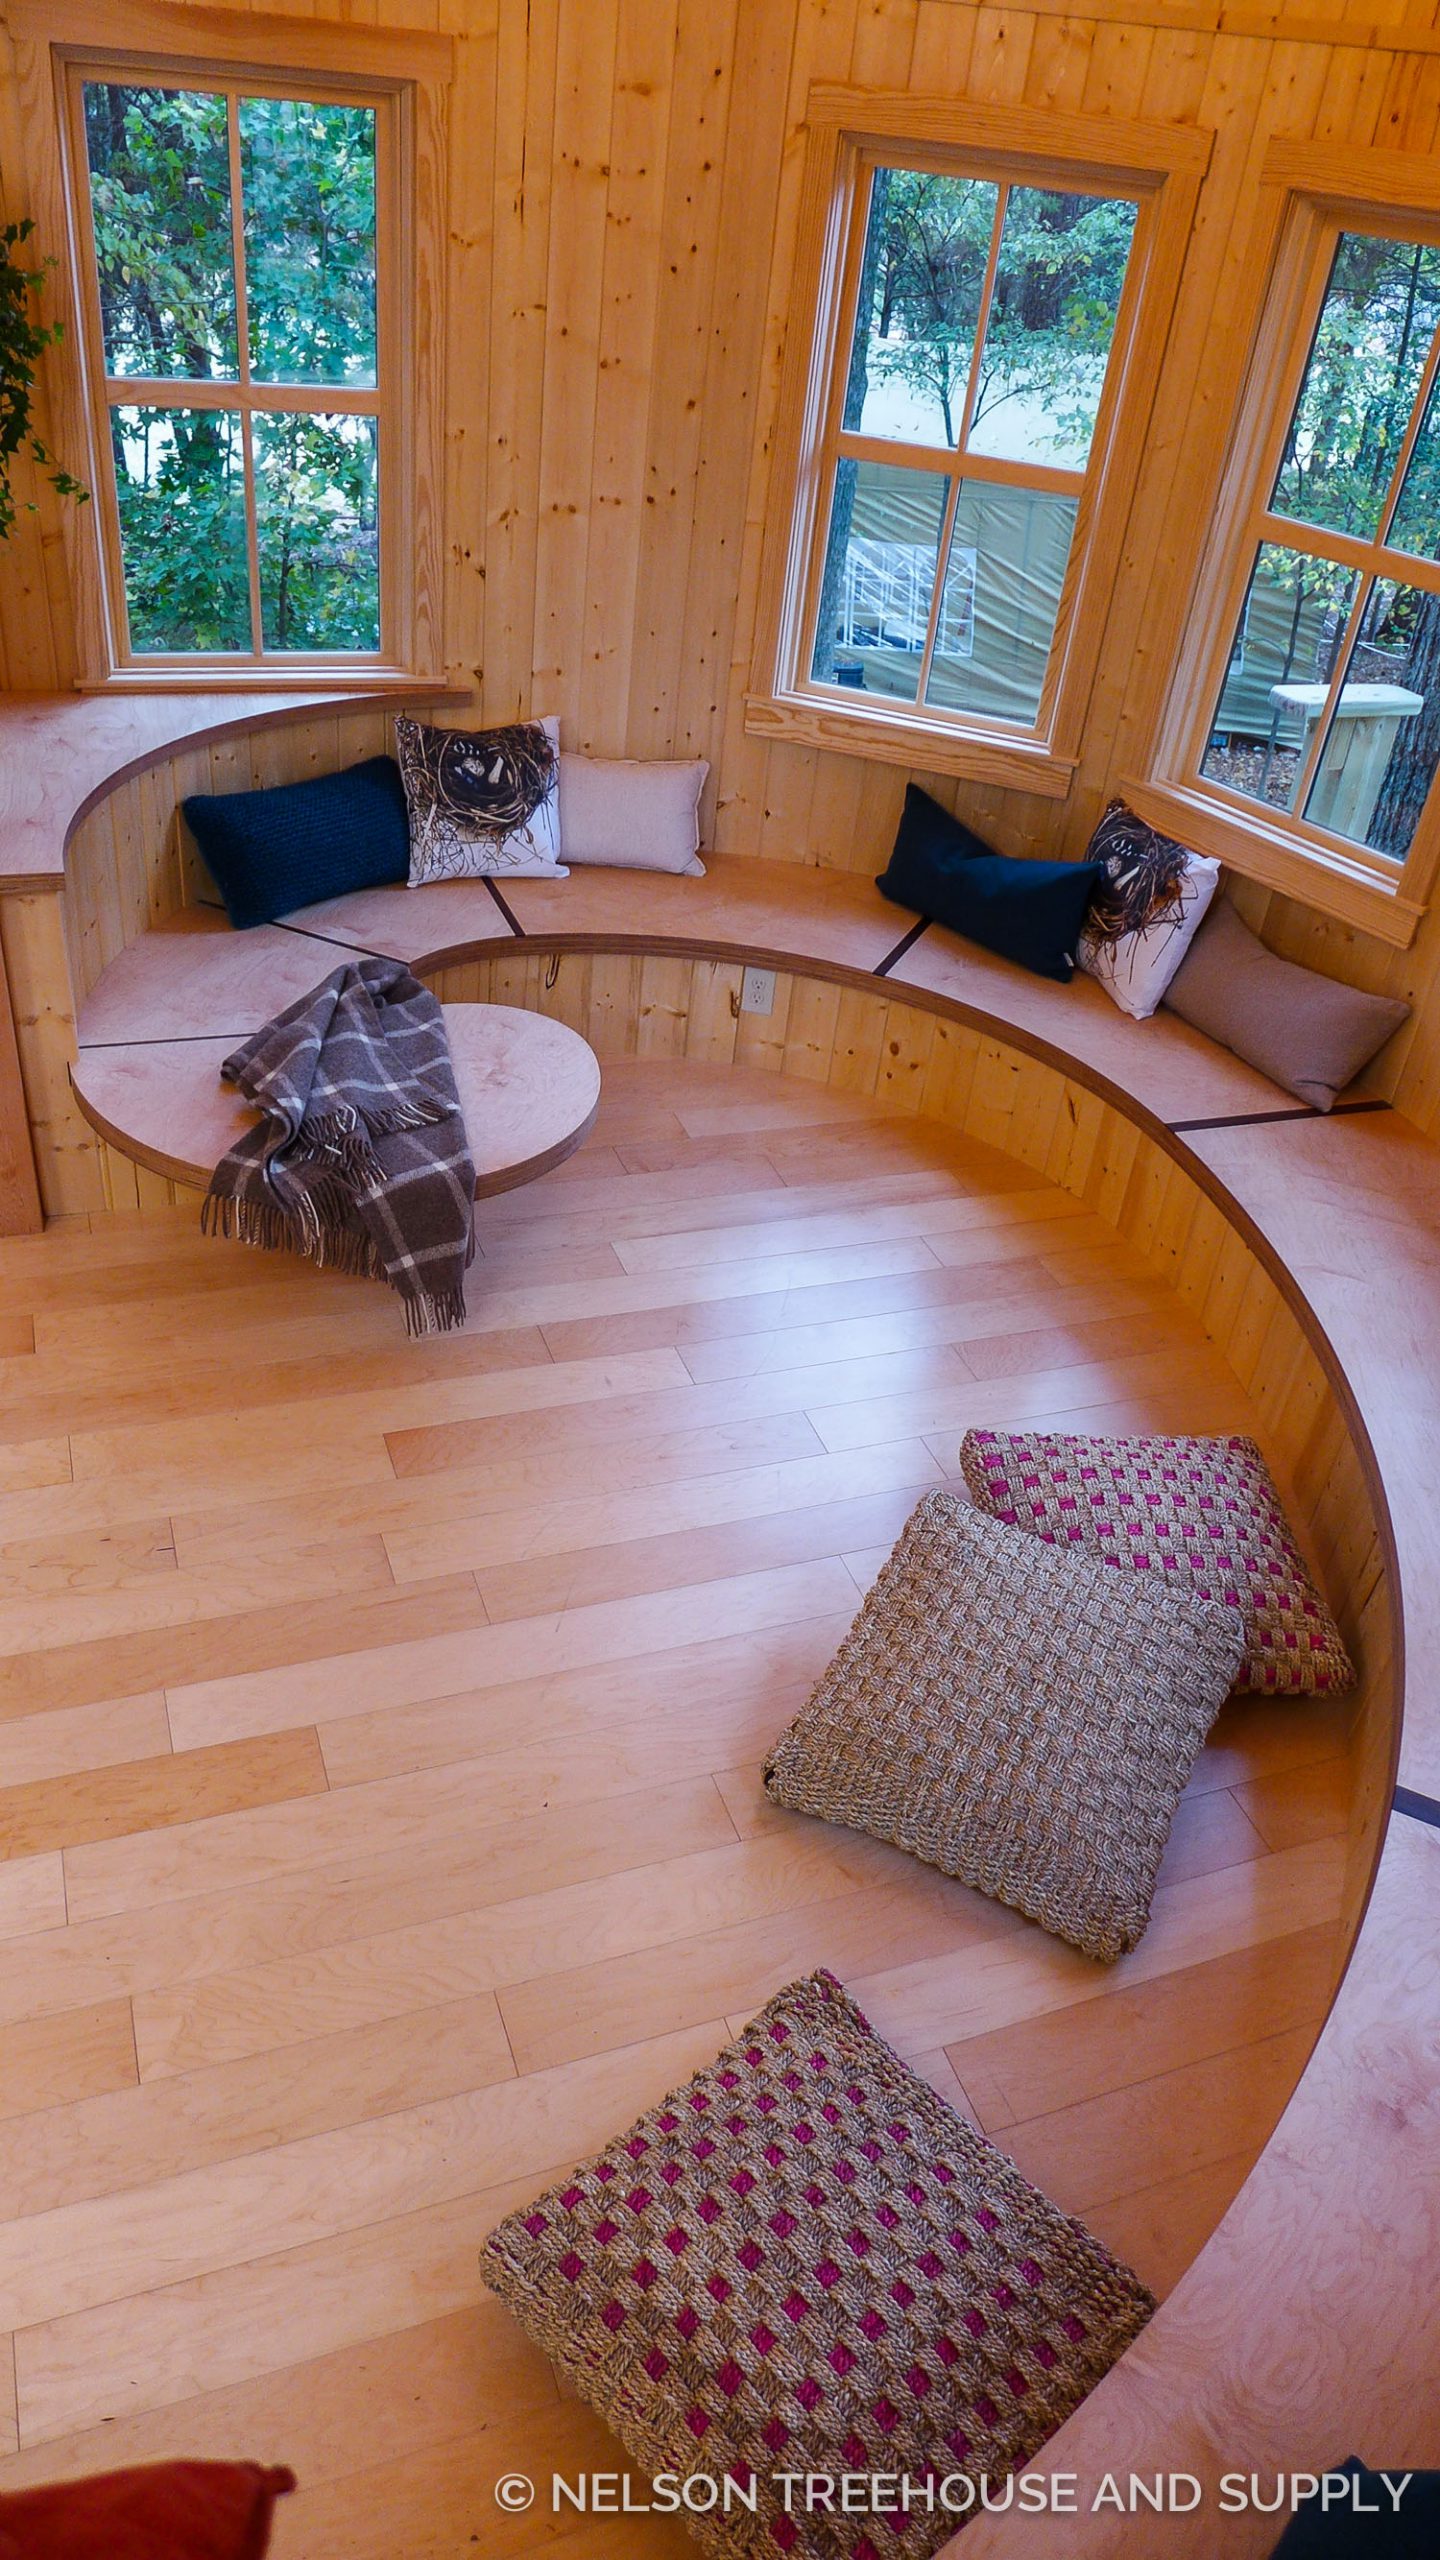
According to Project Manager Toby Maloy, the Fibonacci Spiral is relatively simple to build, especially compared to elliptical shapes, since its curve consists only of radiuses of the squares. The greatest challenge with the project was tweaking the spiral so that it would form a functional bench in real life. The bench cannot perfectly accord to the Fibonacci Spiral; if it did, the final, right-most portions of the curve would block access to the inner, starting portion of the curve. This is because the Fibonacci Spiral gets increasingly wide as it grows outward. If the crew created a perfect Fibonacci Spiral, it would look like a solid half-circle, thereby reducing the available seating area. To ameliorate this, Rolf held the width of the bench constant at a suitable, common dimension for benches. The spiral still grows in width from the inner most sections outward, but it does not grow so wide as to block access to the inner curve. In this way, only the outer curve of the spiral accords to the Fibonacci Spiral, while the inside of the curve is held at a constant bench width.
This is a great example of how mathematically sound models do not always produce functional objects in real life. Our carpenters artfully altered the model to be a functional seat while maintaining the aesthetics of the Fibonacci Spiral. In the end, the Fibonacci bench makes for a unique, aesthetically pleasing reading nook inside the Owl’s Nest Library Treehouse.
We hope you enjoyed learning about the design and build process behind the Fibonacci bench! Make sure to let us know if you try to build your own – comment below, tag us on Instagram, and send photos!
To the trees!


 LOGIN
LOGIN