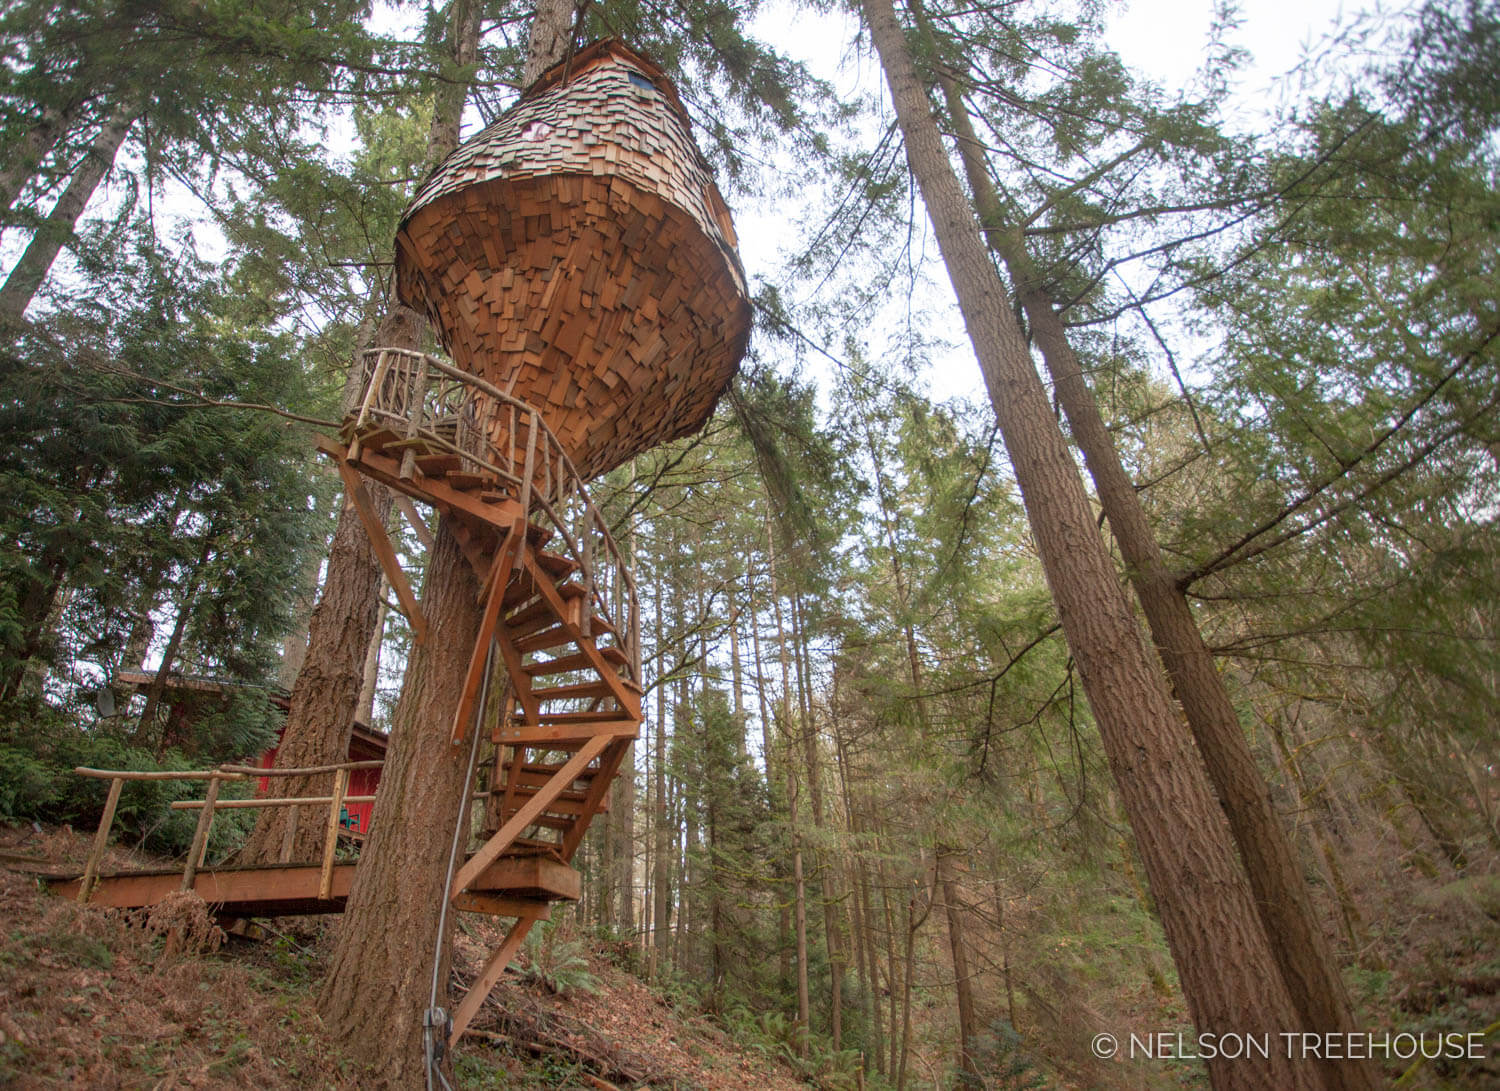
 The Beehive Treehouse showcases a stellar set of winding treehouse stairs.

Hello! Chuck McClellan here. At the World Treehouse Conference earlier this fall, I had the privilege of presenting on the design and construction process for winding stairs. We build these curved staircases for many treehouses: they add equal parts elegance and playfulness to the entry.
After my presentation, I received multiple requests to get this information online for treehouse-DIYers. Without a further ado, I bring you my guide to treehouse winding stair design and construction!
A couple important things to keep in mind about this guide:
I hope you find this a useful resource for building your own treehouse staircase!
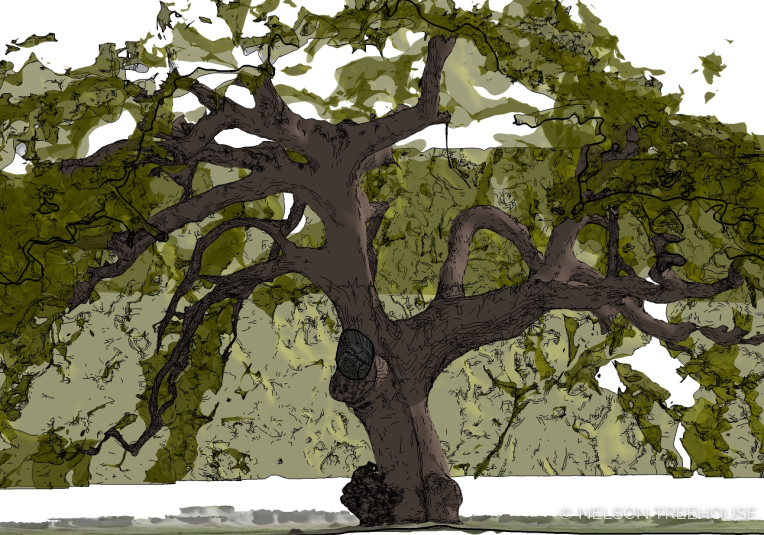
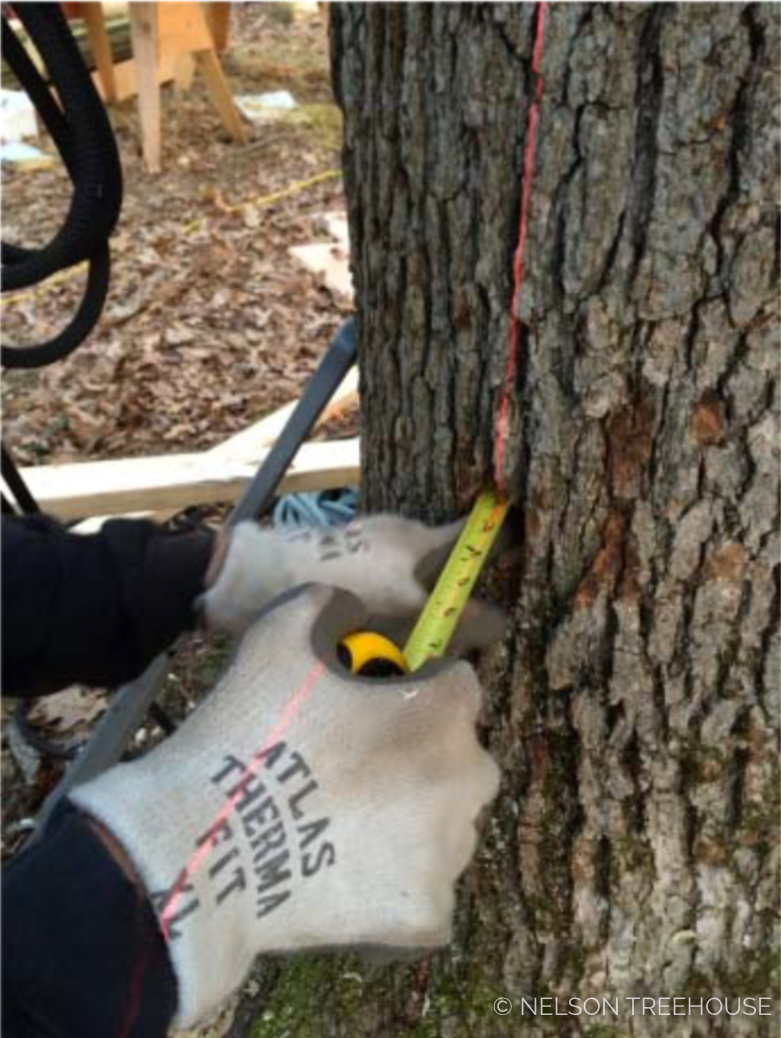
The design process begins with defining the size of the stairs. Let’s assume that you have an entry location on an existing platform in a tree.
I will refer to the radius of this cylinder as the “minimum radius.”
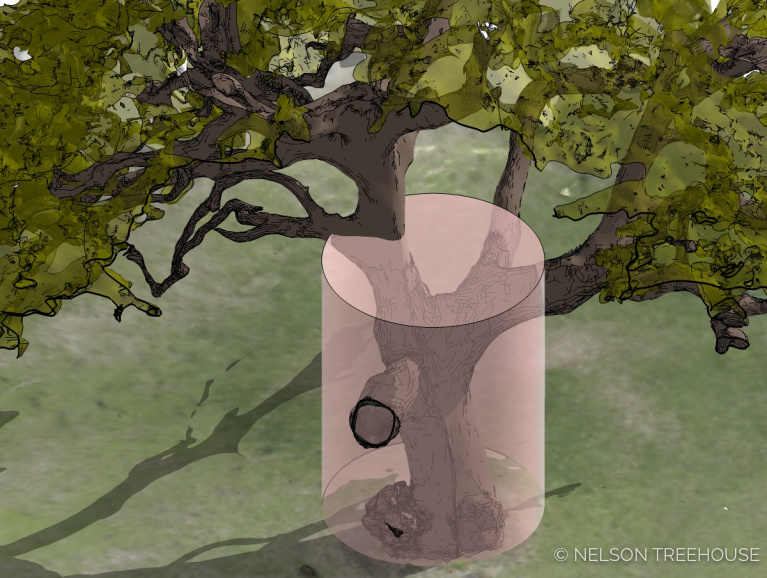 Virtual cylinder defines inside of stairs
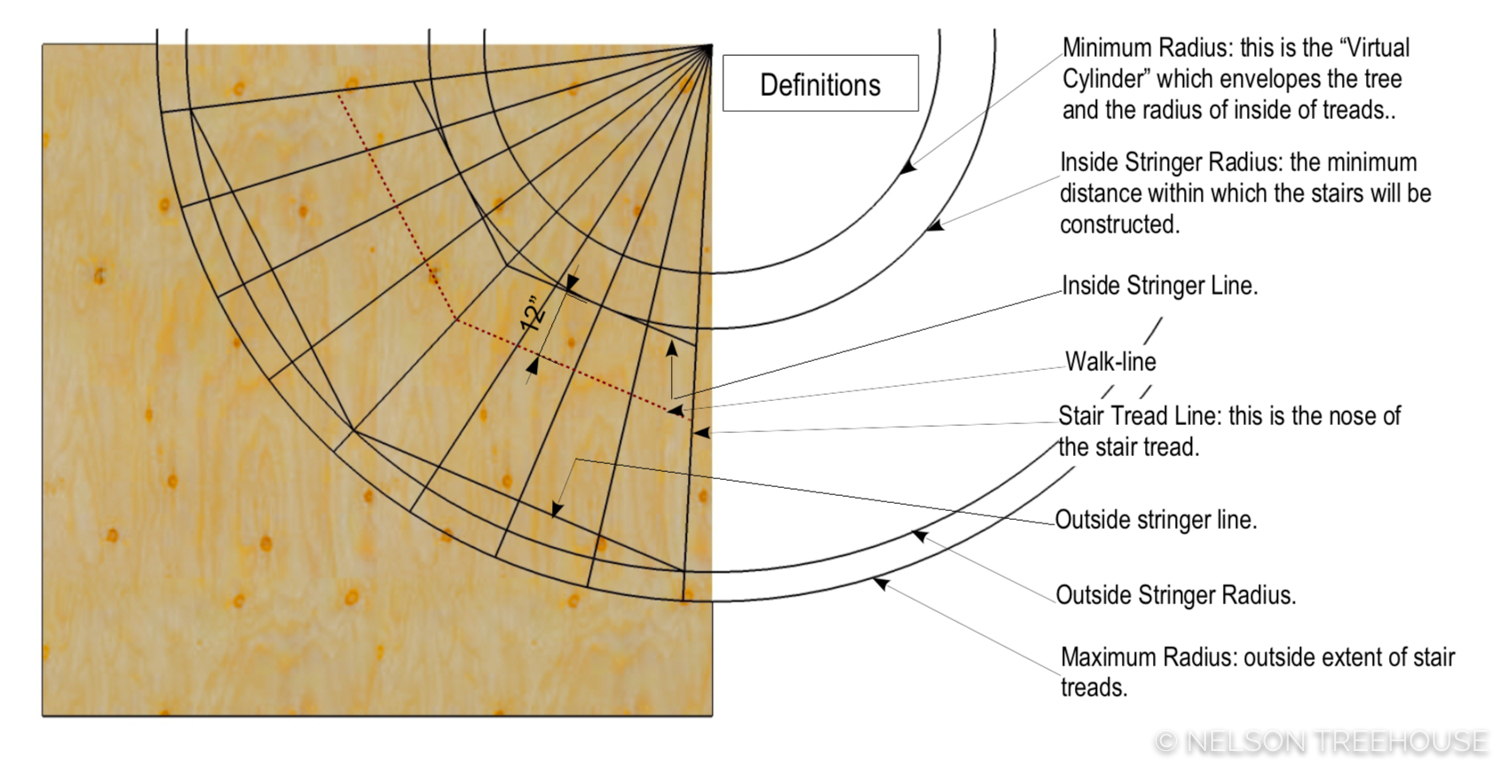
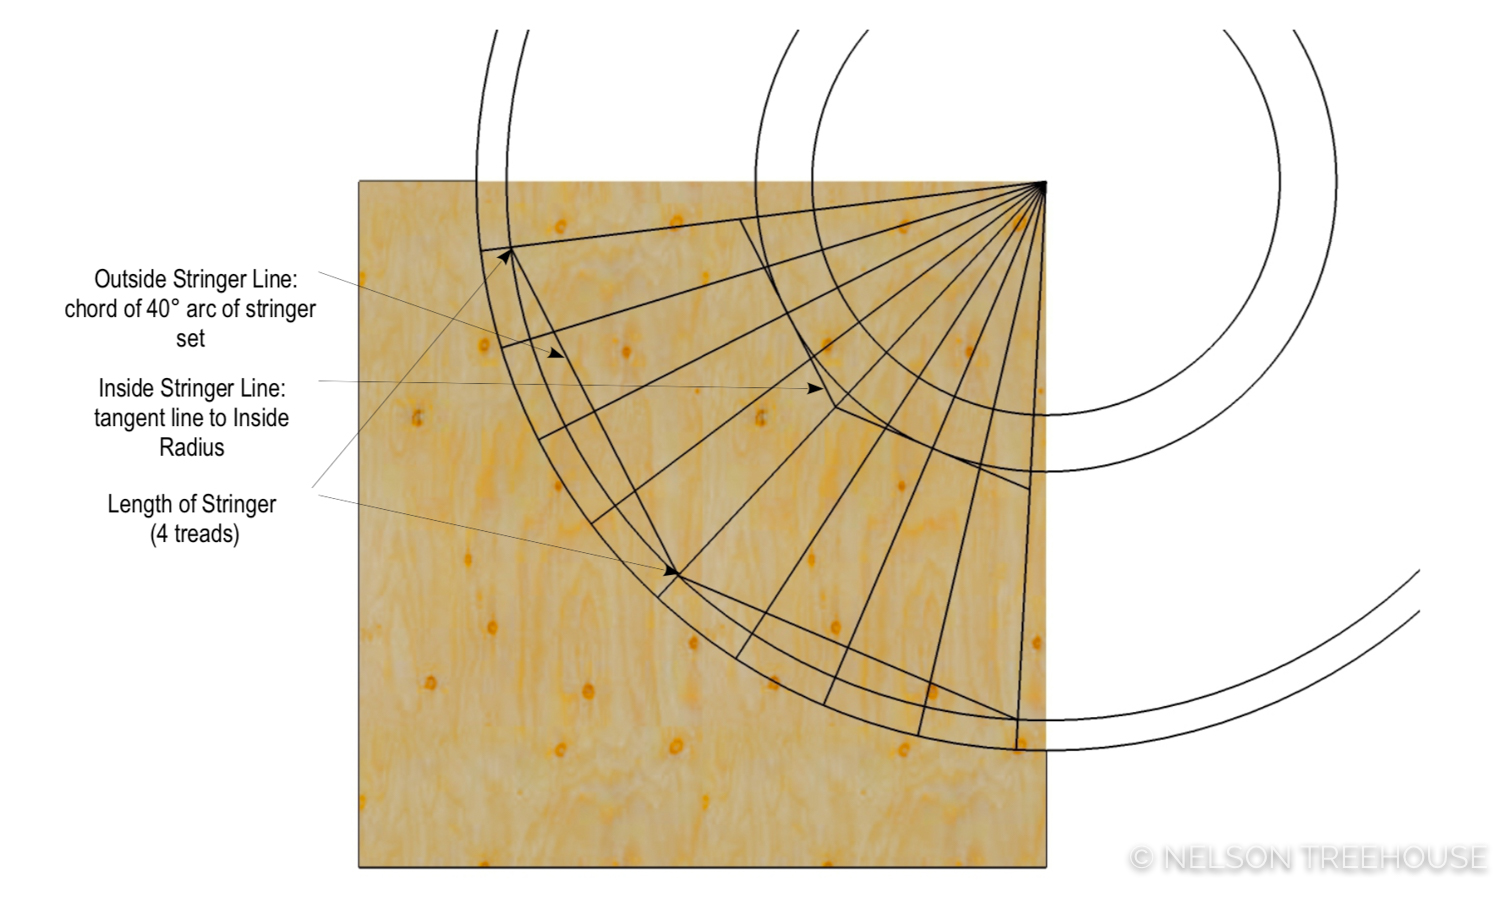
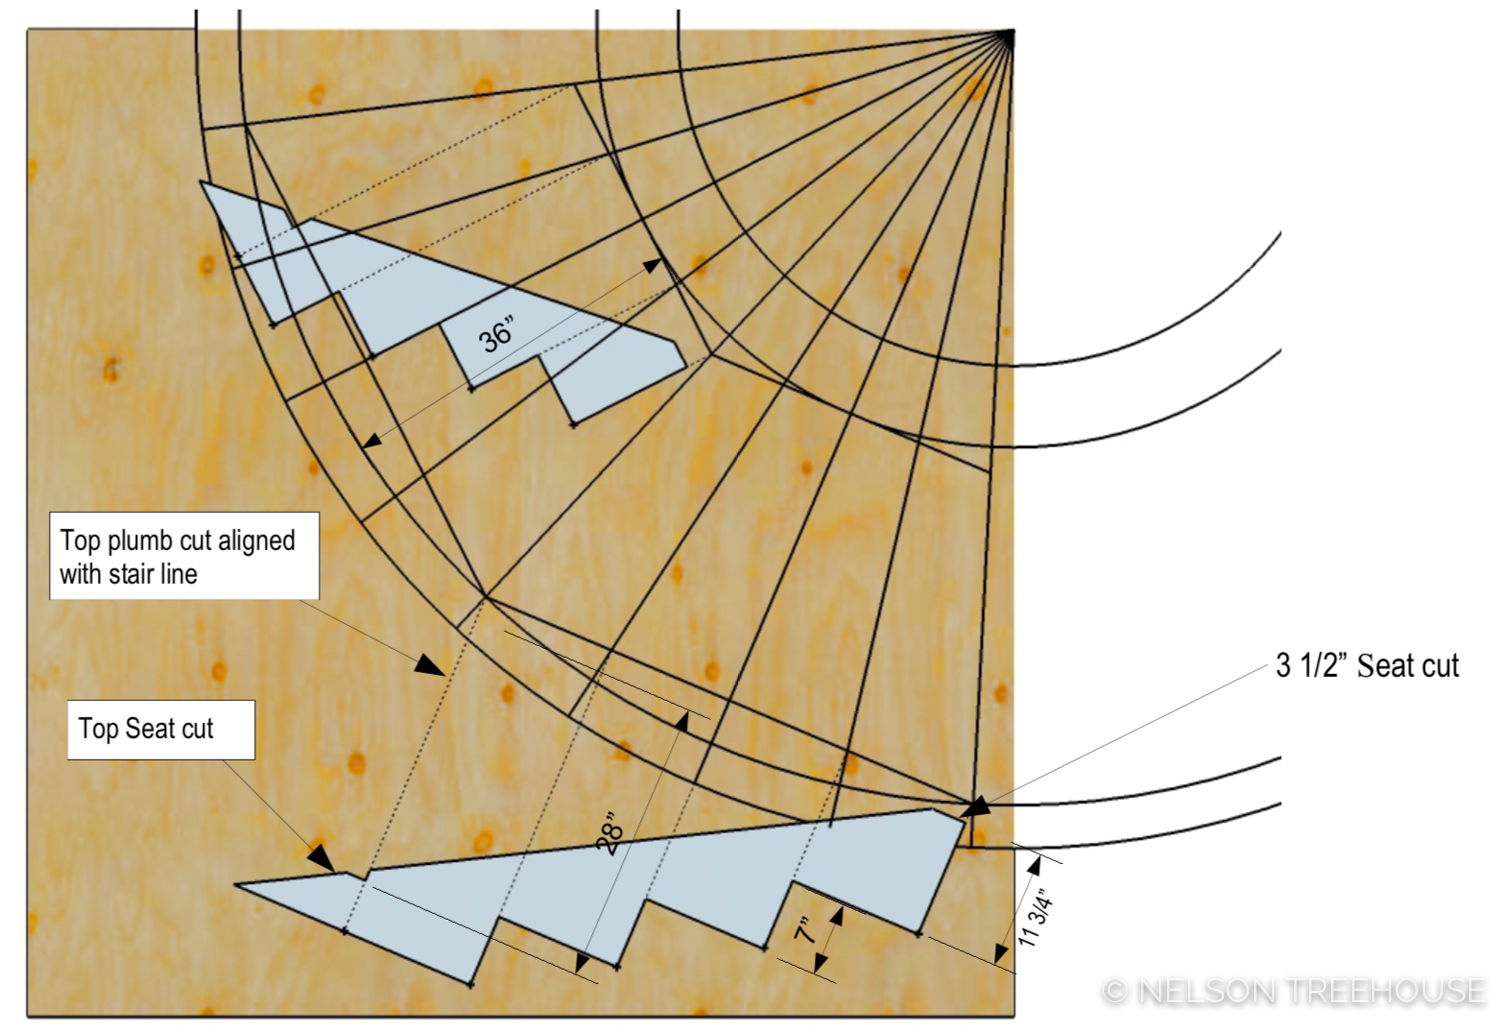
With the minimum radius determined, we can lay out our stairs. This is most easily done on a flat surface. A full-scale plan of the stairs can be drawn on plywood as follows:
Draw stair tread lines. At 12” beyond the inside stringer line (known as the “walk-line”), mark off 9” increments (minimum stair tread depth). Draw pie-shaped stair tread lines through those 9” increments from the center point of the virtual cylinder. In this example, the treads form 10° arcs.
In this example, I have designed for four treads per stringer set.
Draw inside stringer line as the tangent to the inside stringer radius and parallel to outside stringer line.
The images below present plan and perspective views of the stringers for clarity. Notice the extra length at the top of the stringers. The top plumb cut will be determined later.
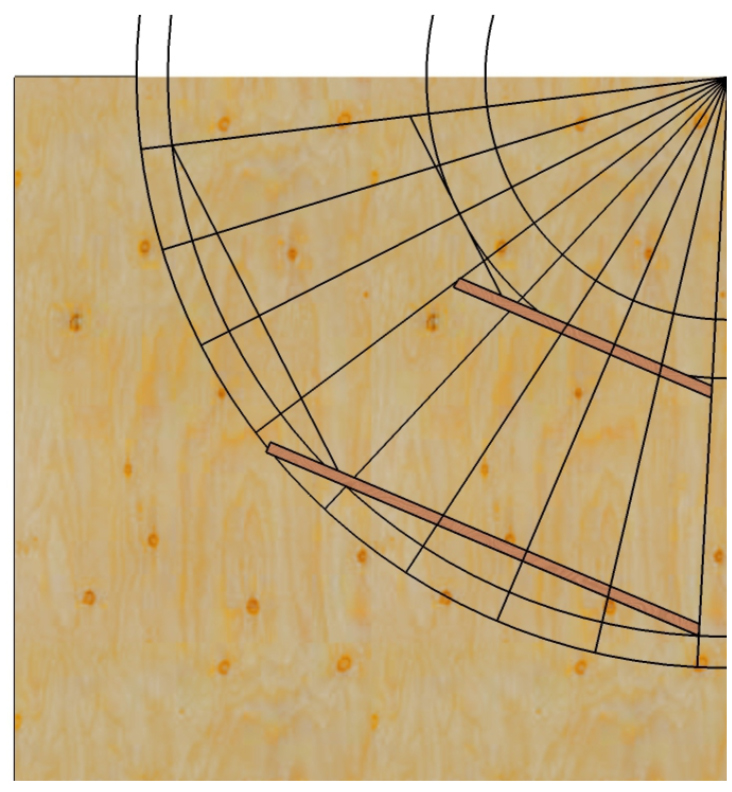
The stringers can be simply laid out thus:
You now have the cut layout for your stringers. You can cut the plywood and use these as patterns.
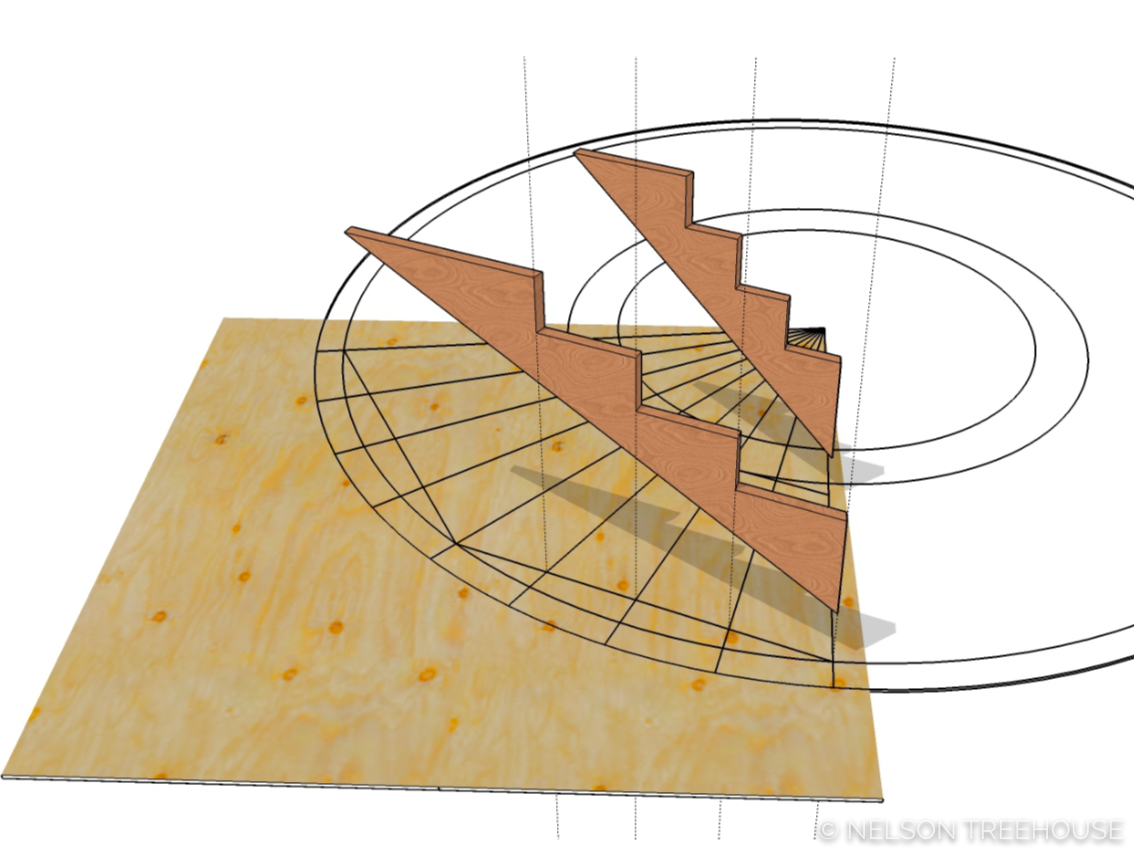
Next, you will be figuring stringer intersections and knee brace placement.
In the image below, notice the 2×4 risers on the second stringer set. I’ve left these out until now for clarity. It is simple to lay out beam cuts at this point.
Here is what it will look like:

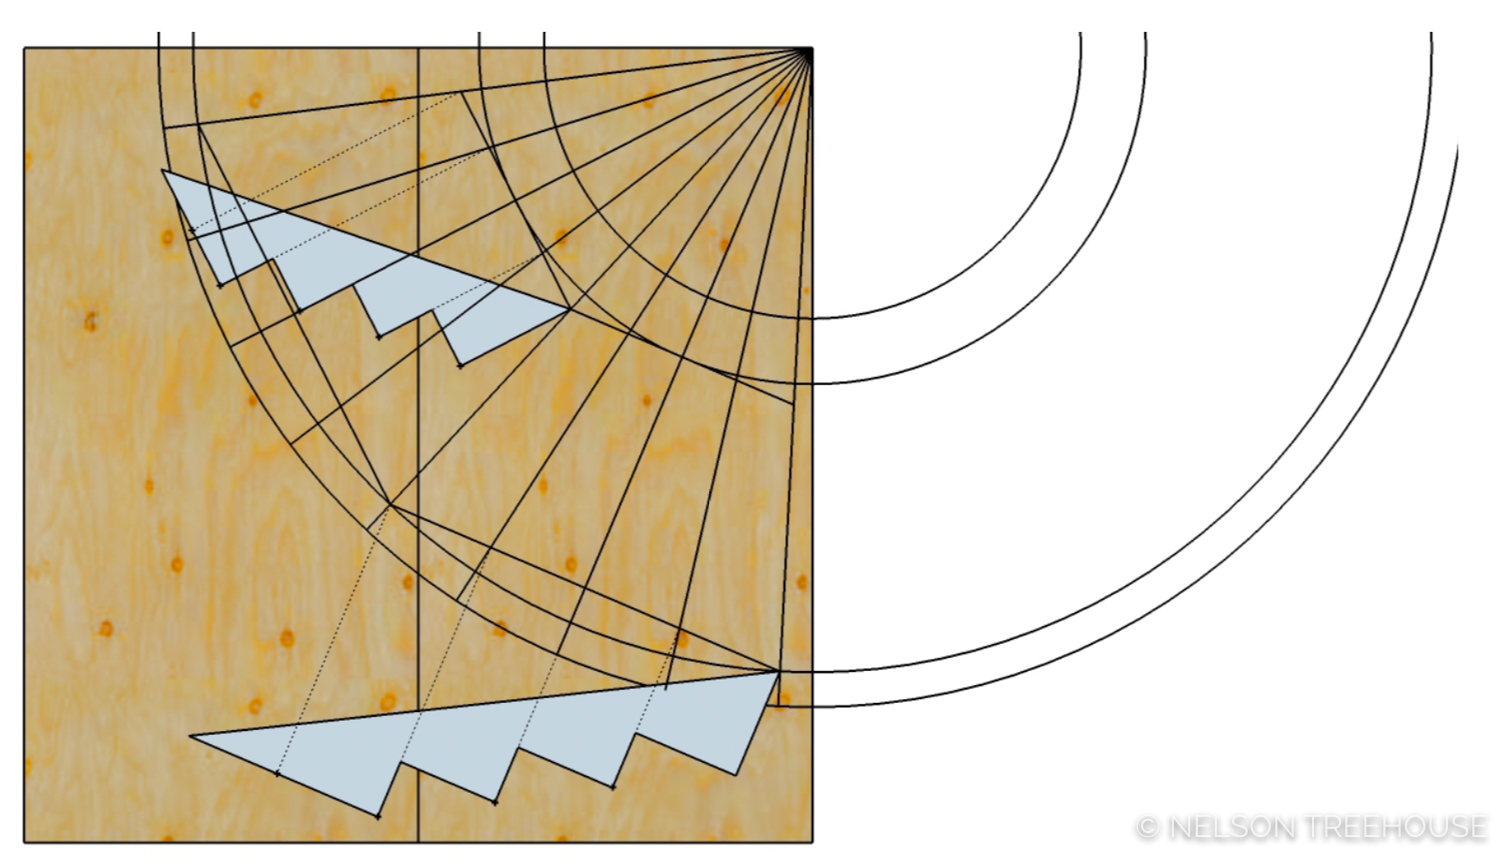
To finish cutting the stair patterns, you now lay out the knee beam cuts:
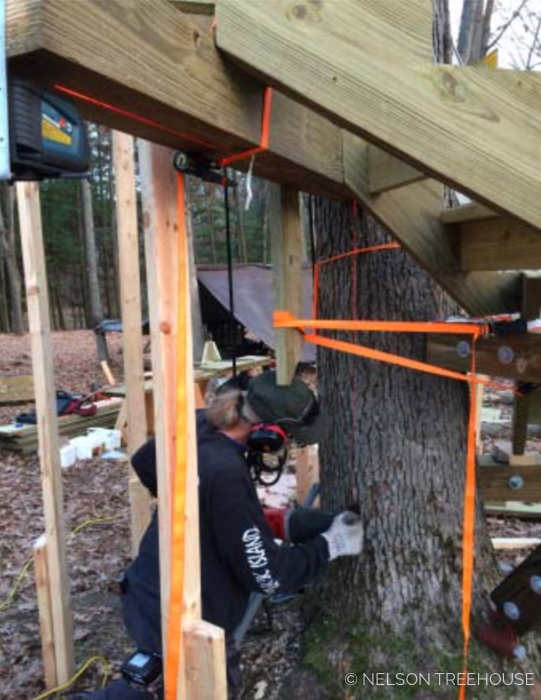
I prefer to construct my stairs from top down. This involves using temporary 2×4 scaffolding, a “story pole,” and a “clock ring.”
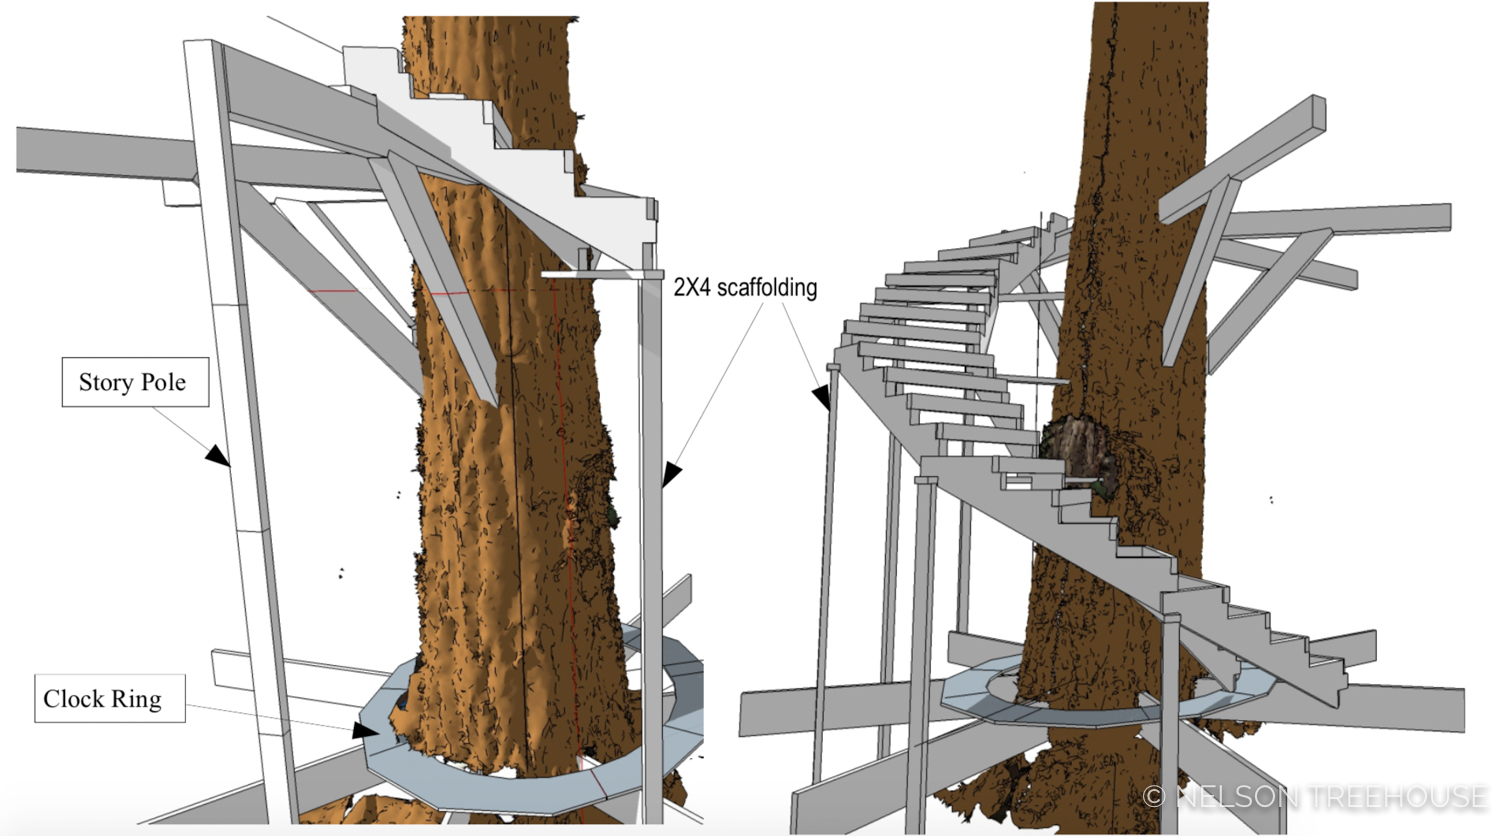
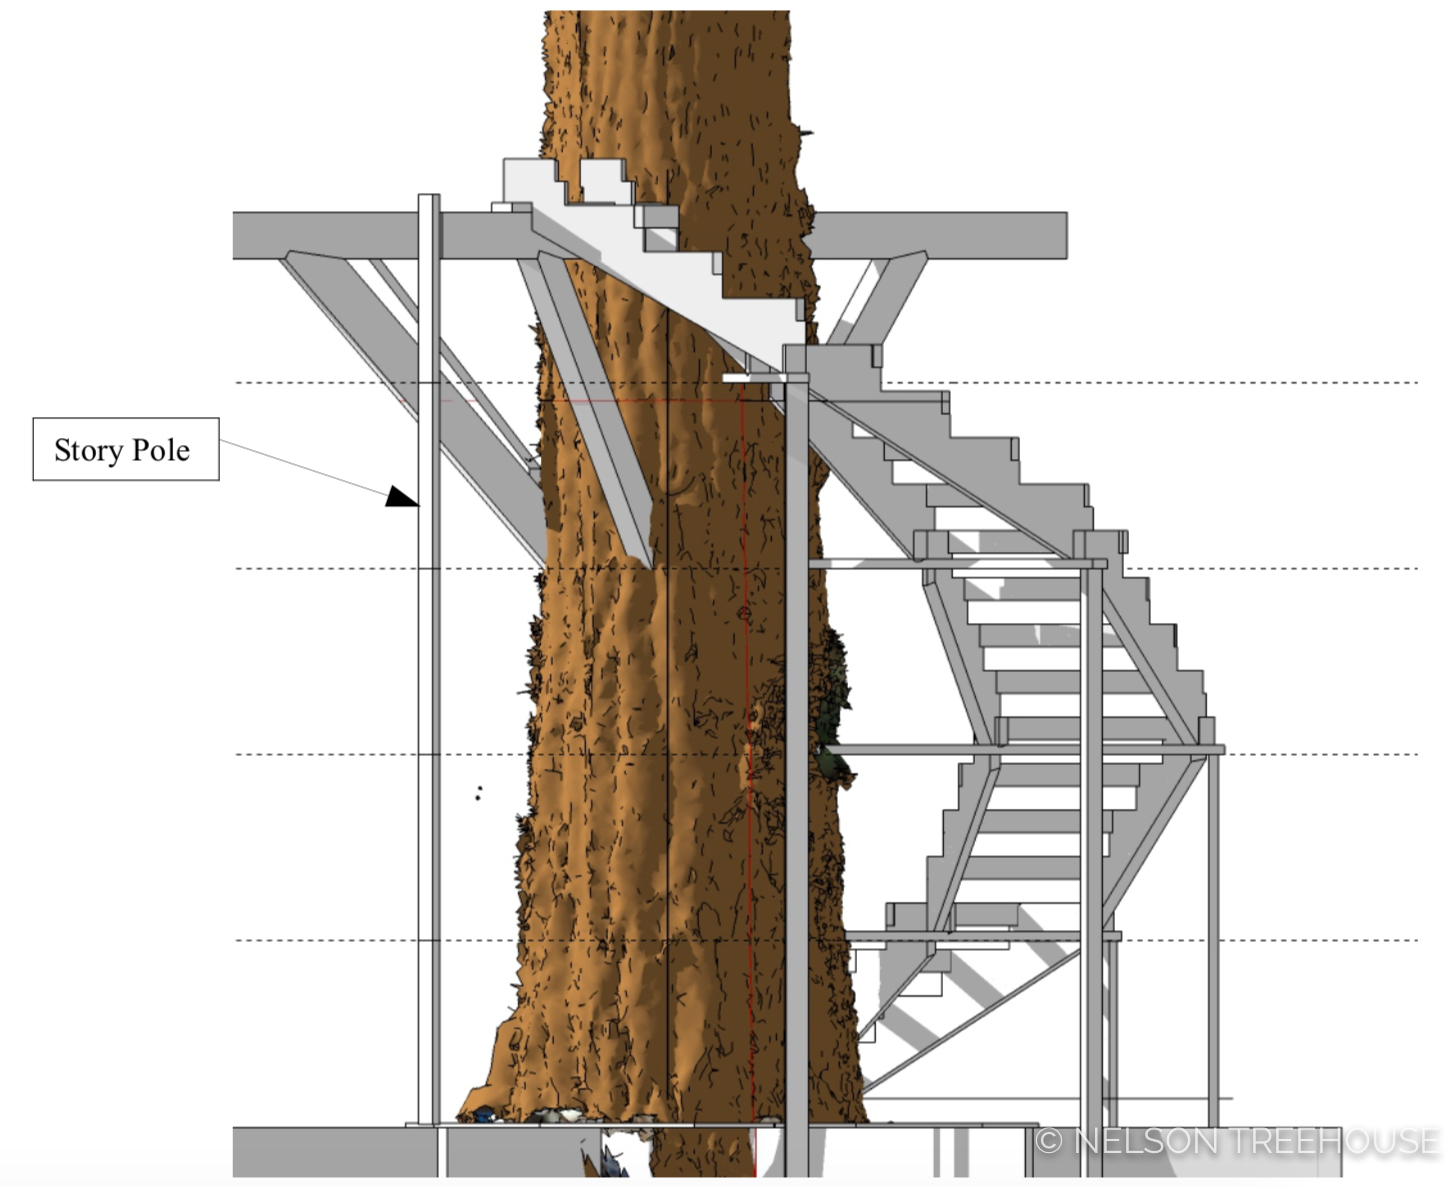
STORY POLE
The story pole here is a vertical 2×4 with reference lines that mark the top of the knee brace beam heights. In the example here, you will notice that the scaffold supporting the stringers is aligned with these reference marks.
CLOCK RING
The clock ring we use is a ring of 1/2” plywood cut to the minimum radius and at least 8” wide. I’ve shown the outside edge with straight cuts for simplicity. You can see that the clock ring lines reference the knee brace orientation.
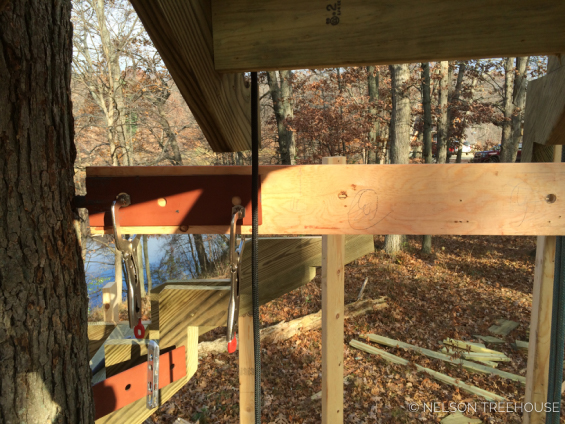
Laser lines from story pole and clock ring are used for knee brace beam placement
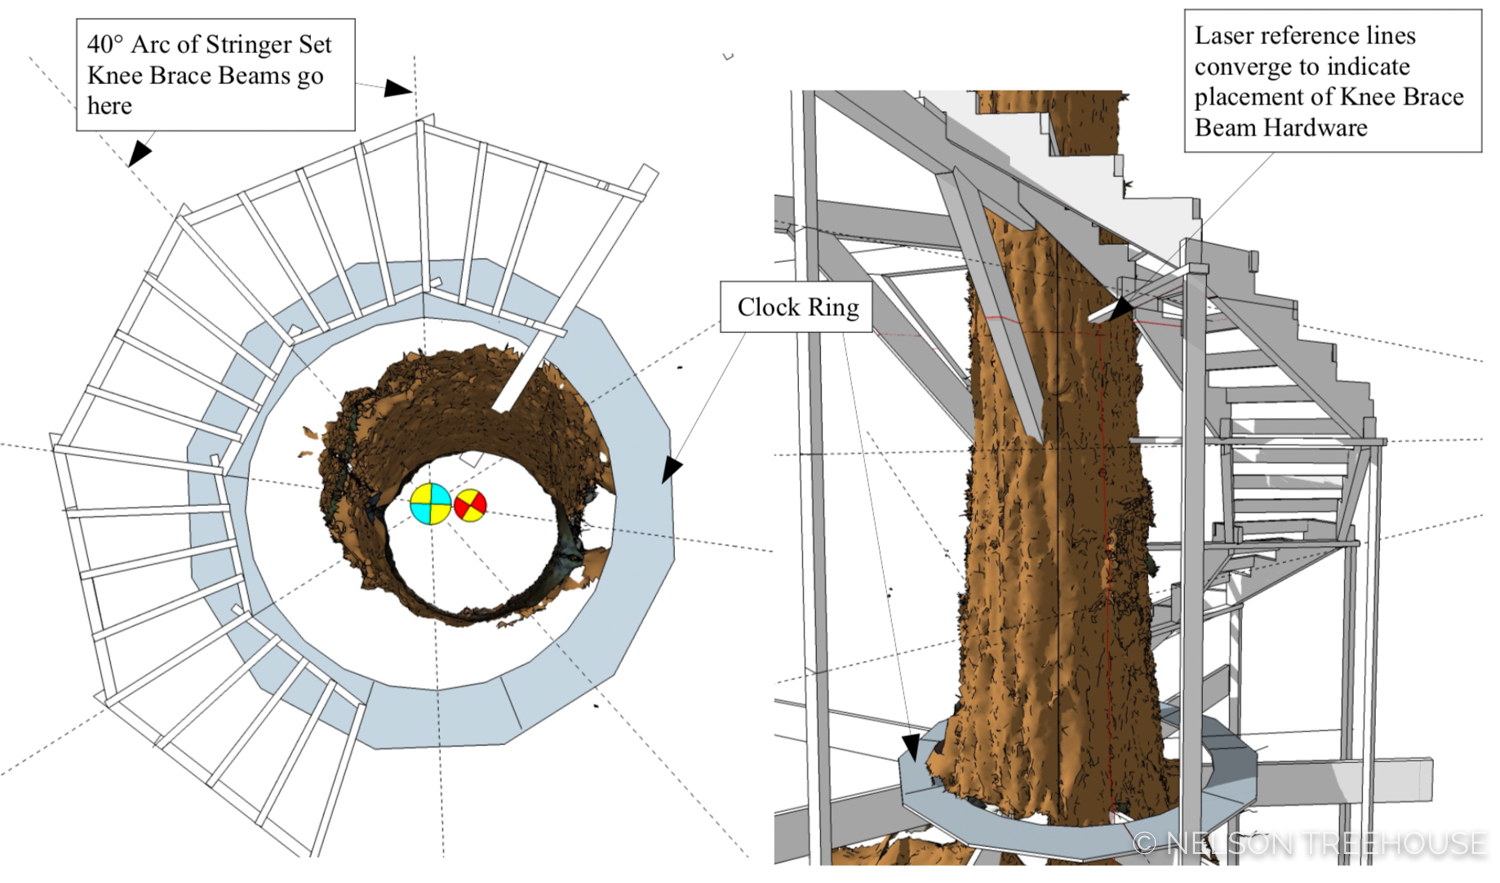
LINE LASER FOR REFERENCE
In the picture below, the vertical and horizontal laser lines converge at the center of the knee brace beam. These laser lines are referencing a story pole and a clock ring, both out of view.
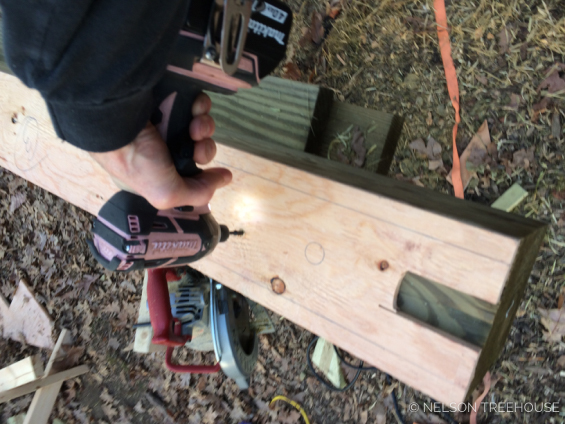
PATTERNS
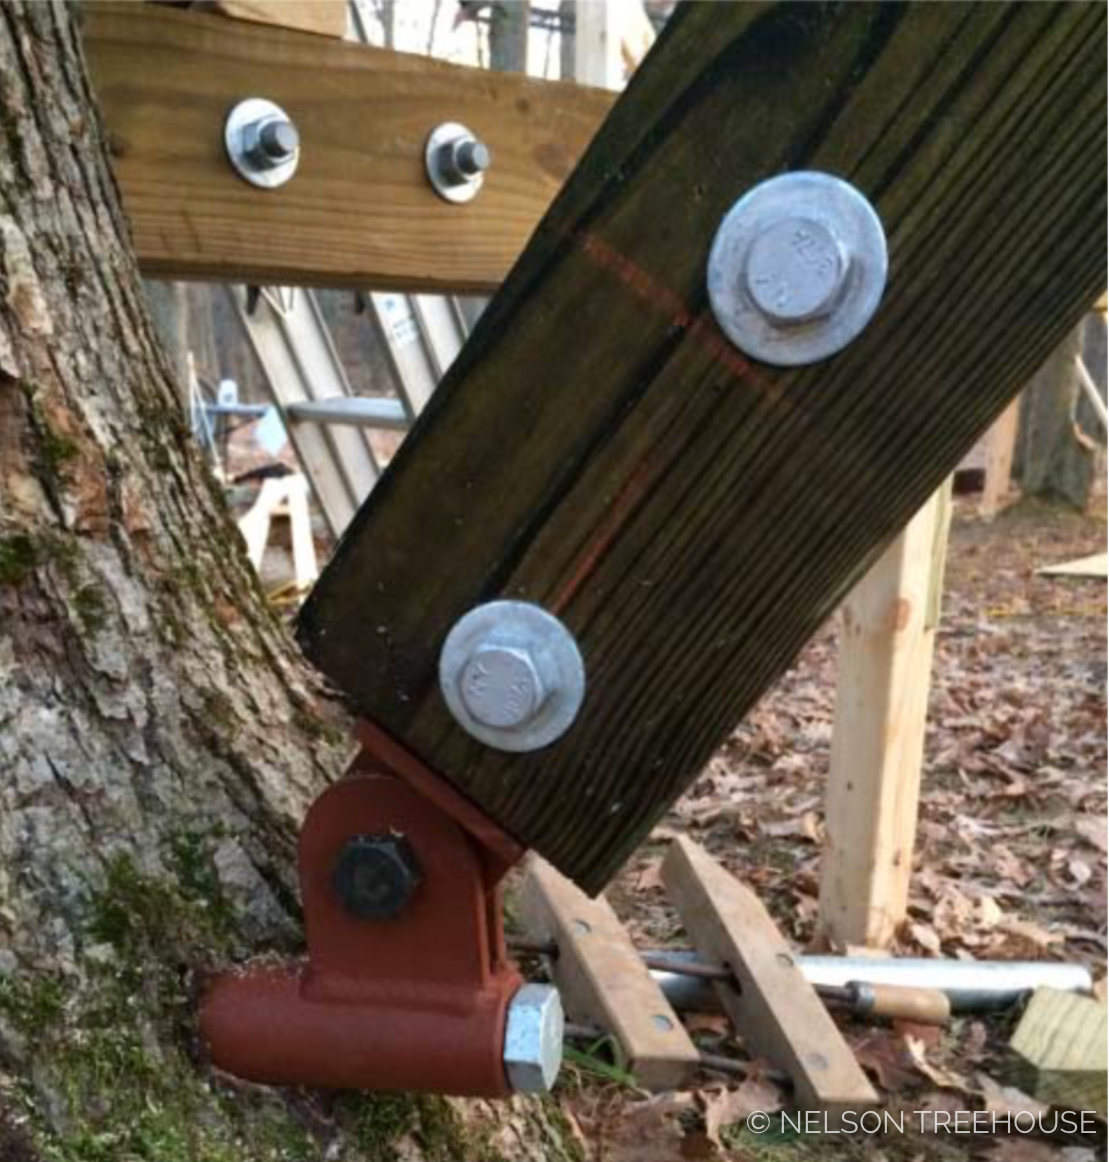
Patterns are made from 1/2” plywood. They are used to orient the knee beams to the paddle tabs and to mark through-bolt holes.
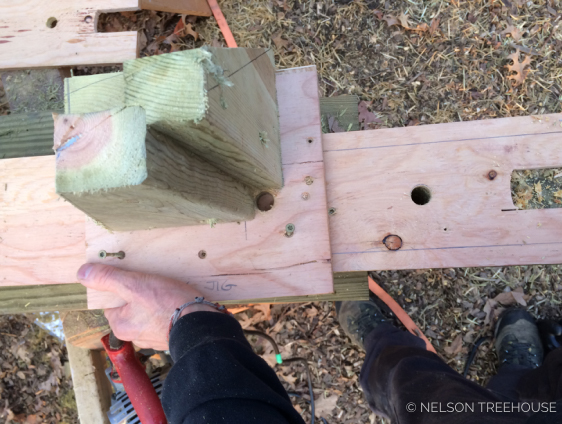
The bottom bracket hardware is placed with lasers. Patterns are used to fit the knee brace beam.

From here, you can continue this process to assemble the full winding staircase onsite.
In an upcoming blog post, I’ll break down our process for the design and construction of stair rails. Stay tuned!
I hope you’ve found this guide helpful!
For the heavy-duty treehouse hardware you’ll need for this project, head to our online hardware store.
Need help with your treehouse project? We offer consultations for DIY-ers – learn more here.


 LOGIN
LOGIN